
Topic 3: Notebooks#
Introduction#
Except for a brief look at interacting with Python via REPL, all your coding so far has involved editing a program in a text editor, saving it, then typing python script.py (or similar) to see what happens.
Though ultimately writing Python programs is what it’s all about, when you are learning the language and experimenting, this process can get a bit tedious.
So in this workshop you will be introduced to a new way of exploring Python - through Interactive Notebooks.
Task 1#
In a terminal window, navigate to your
PHAR2062/Topic 3 - Notebooksfolder.Type:
jupyter notebook
Analysis#
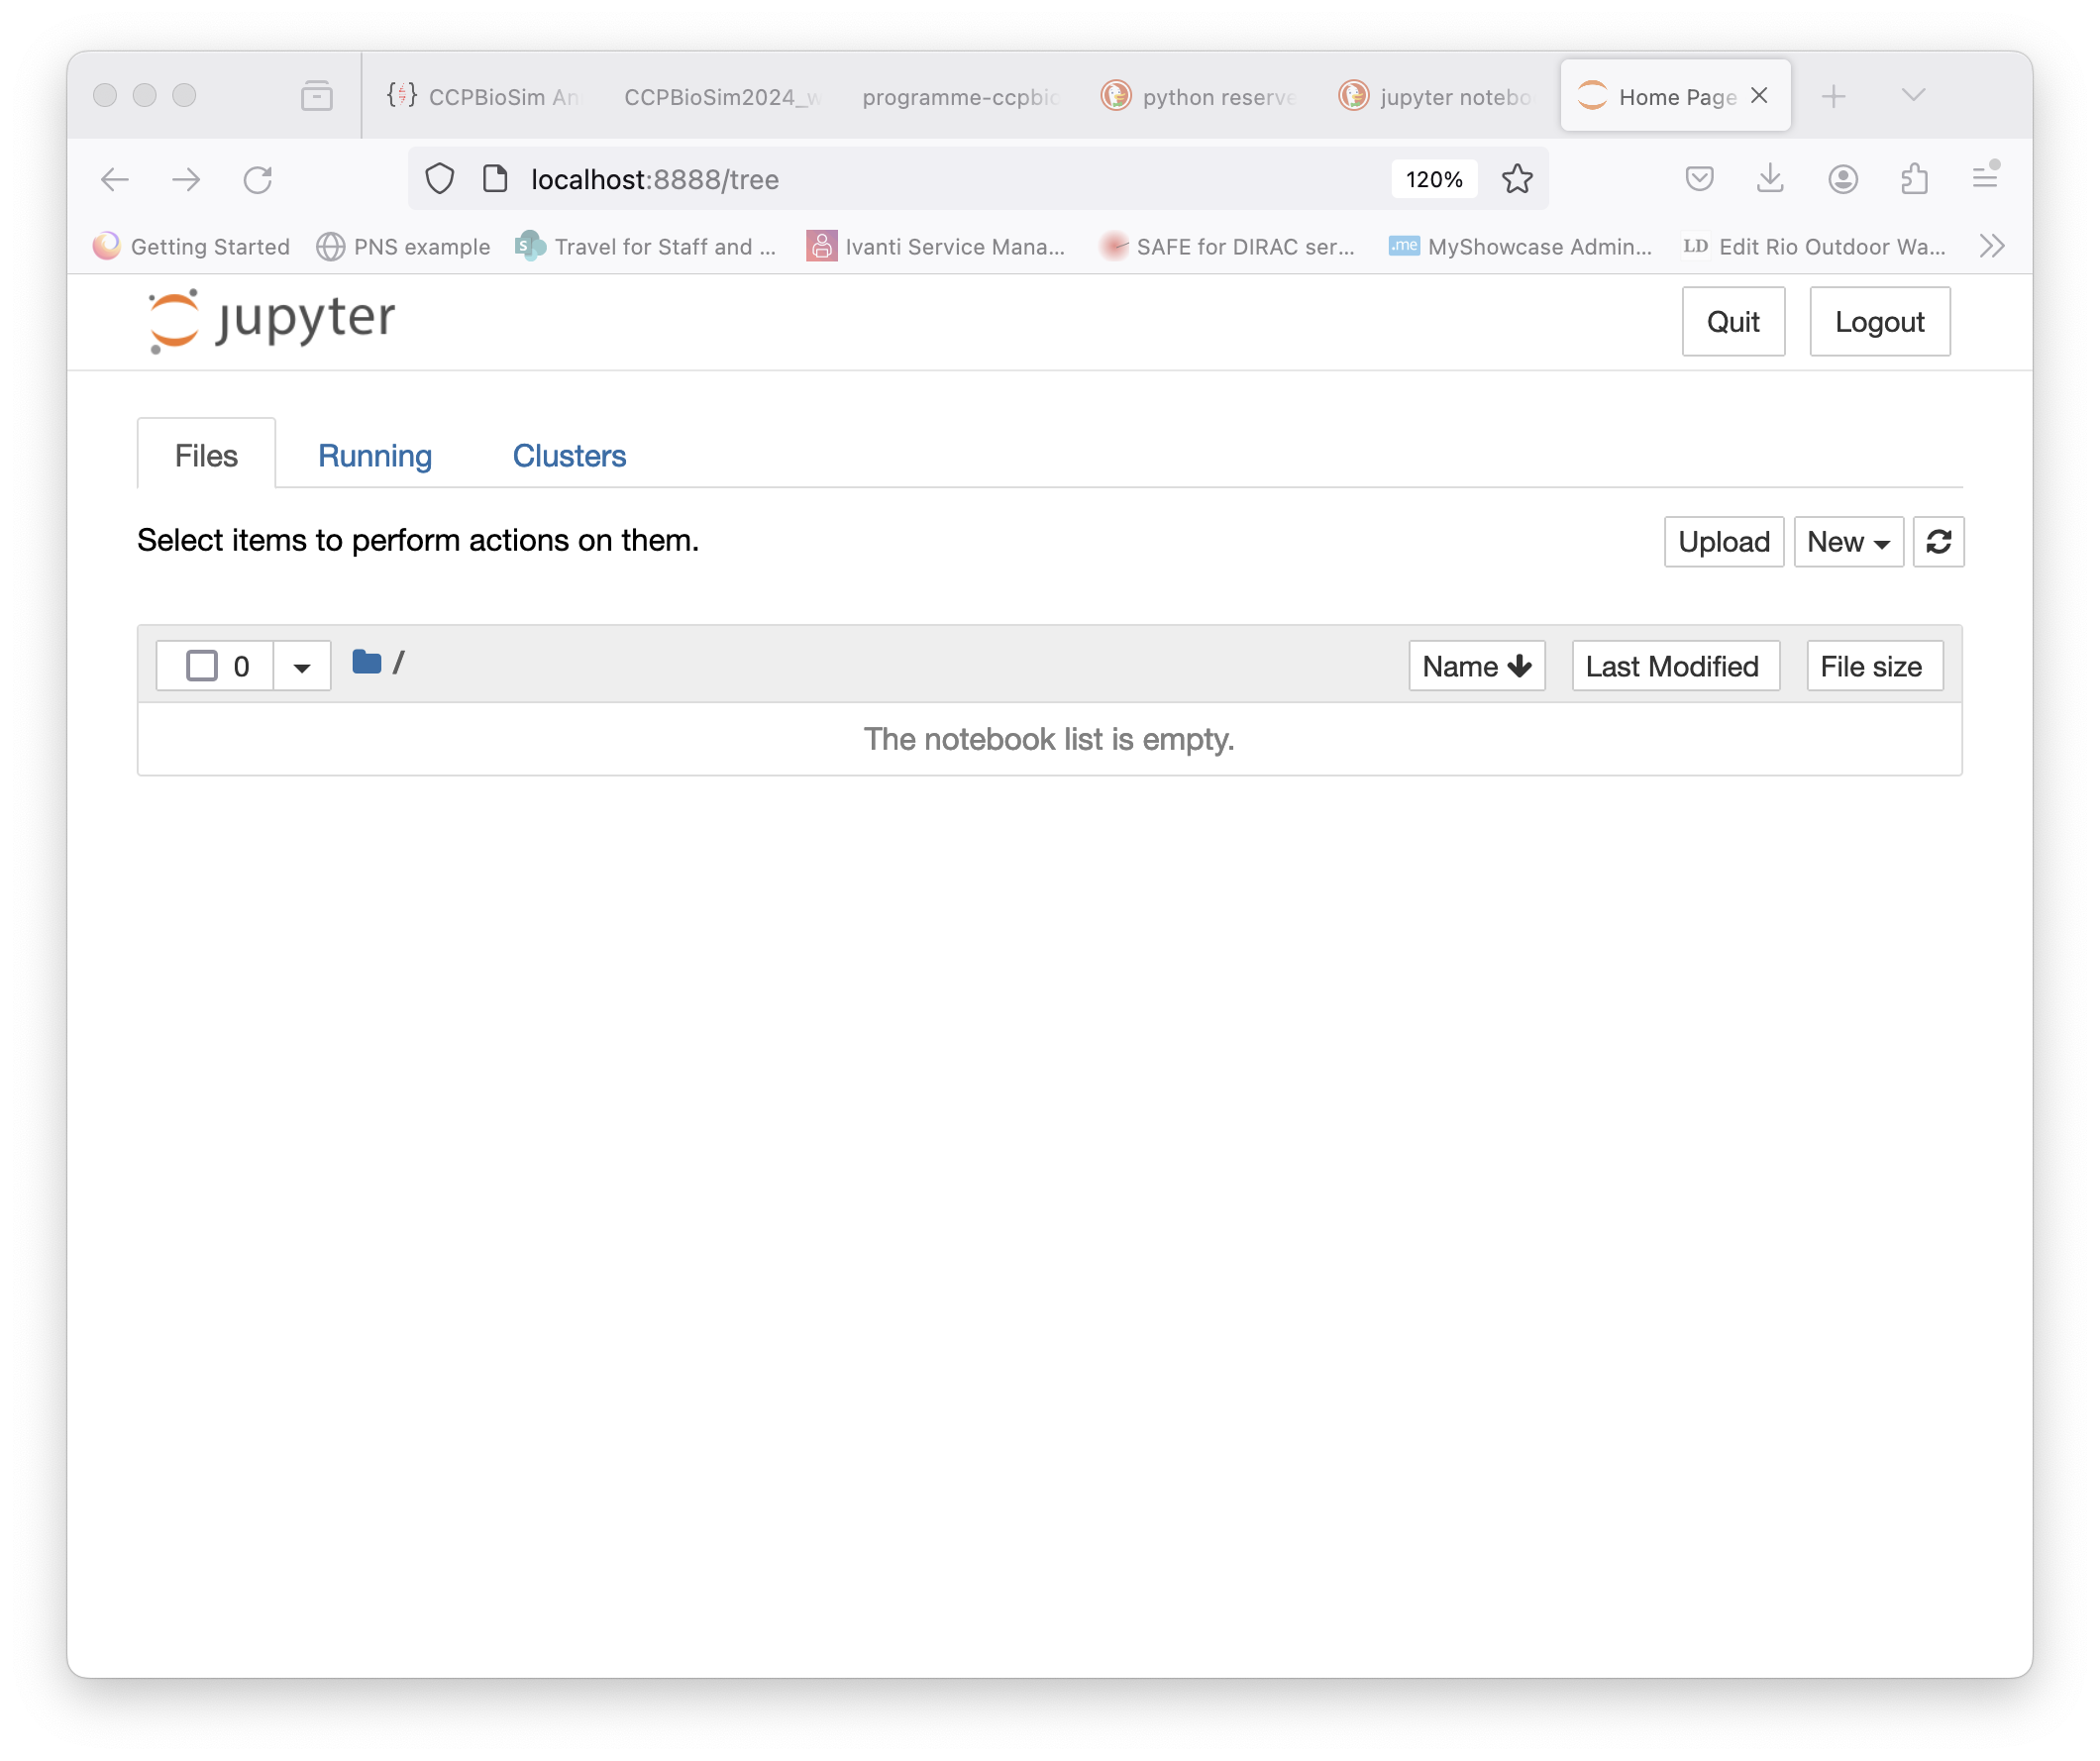
If the software installation process you went through at the very start of this module has gone to plan, after a short while, and following quite a few complex-looking messages being written to your screen, your web browser should open and a new tab in it show something very similar to this:
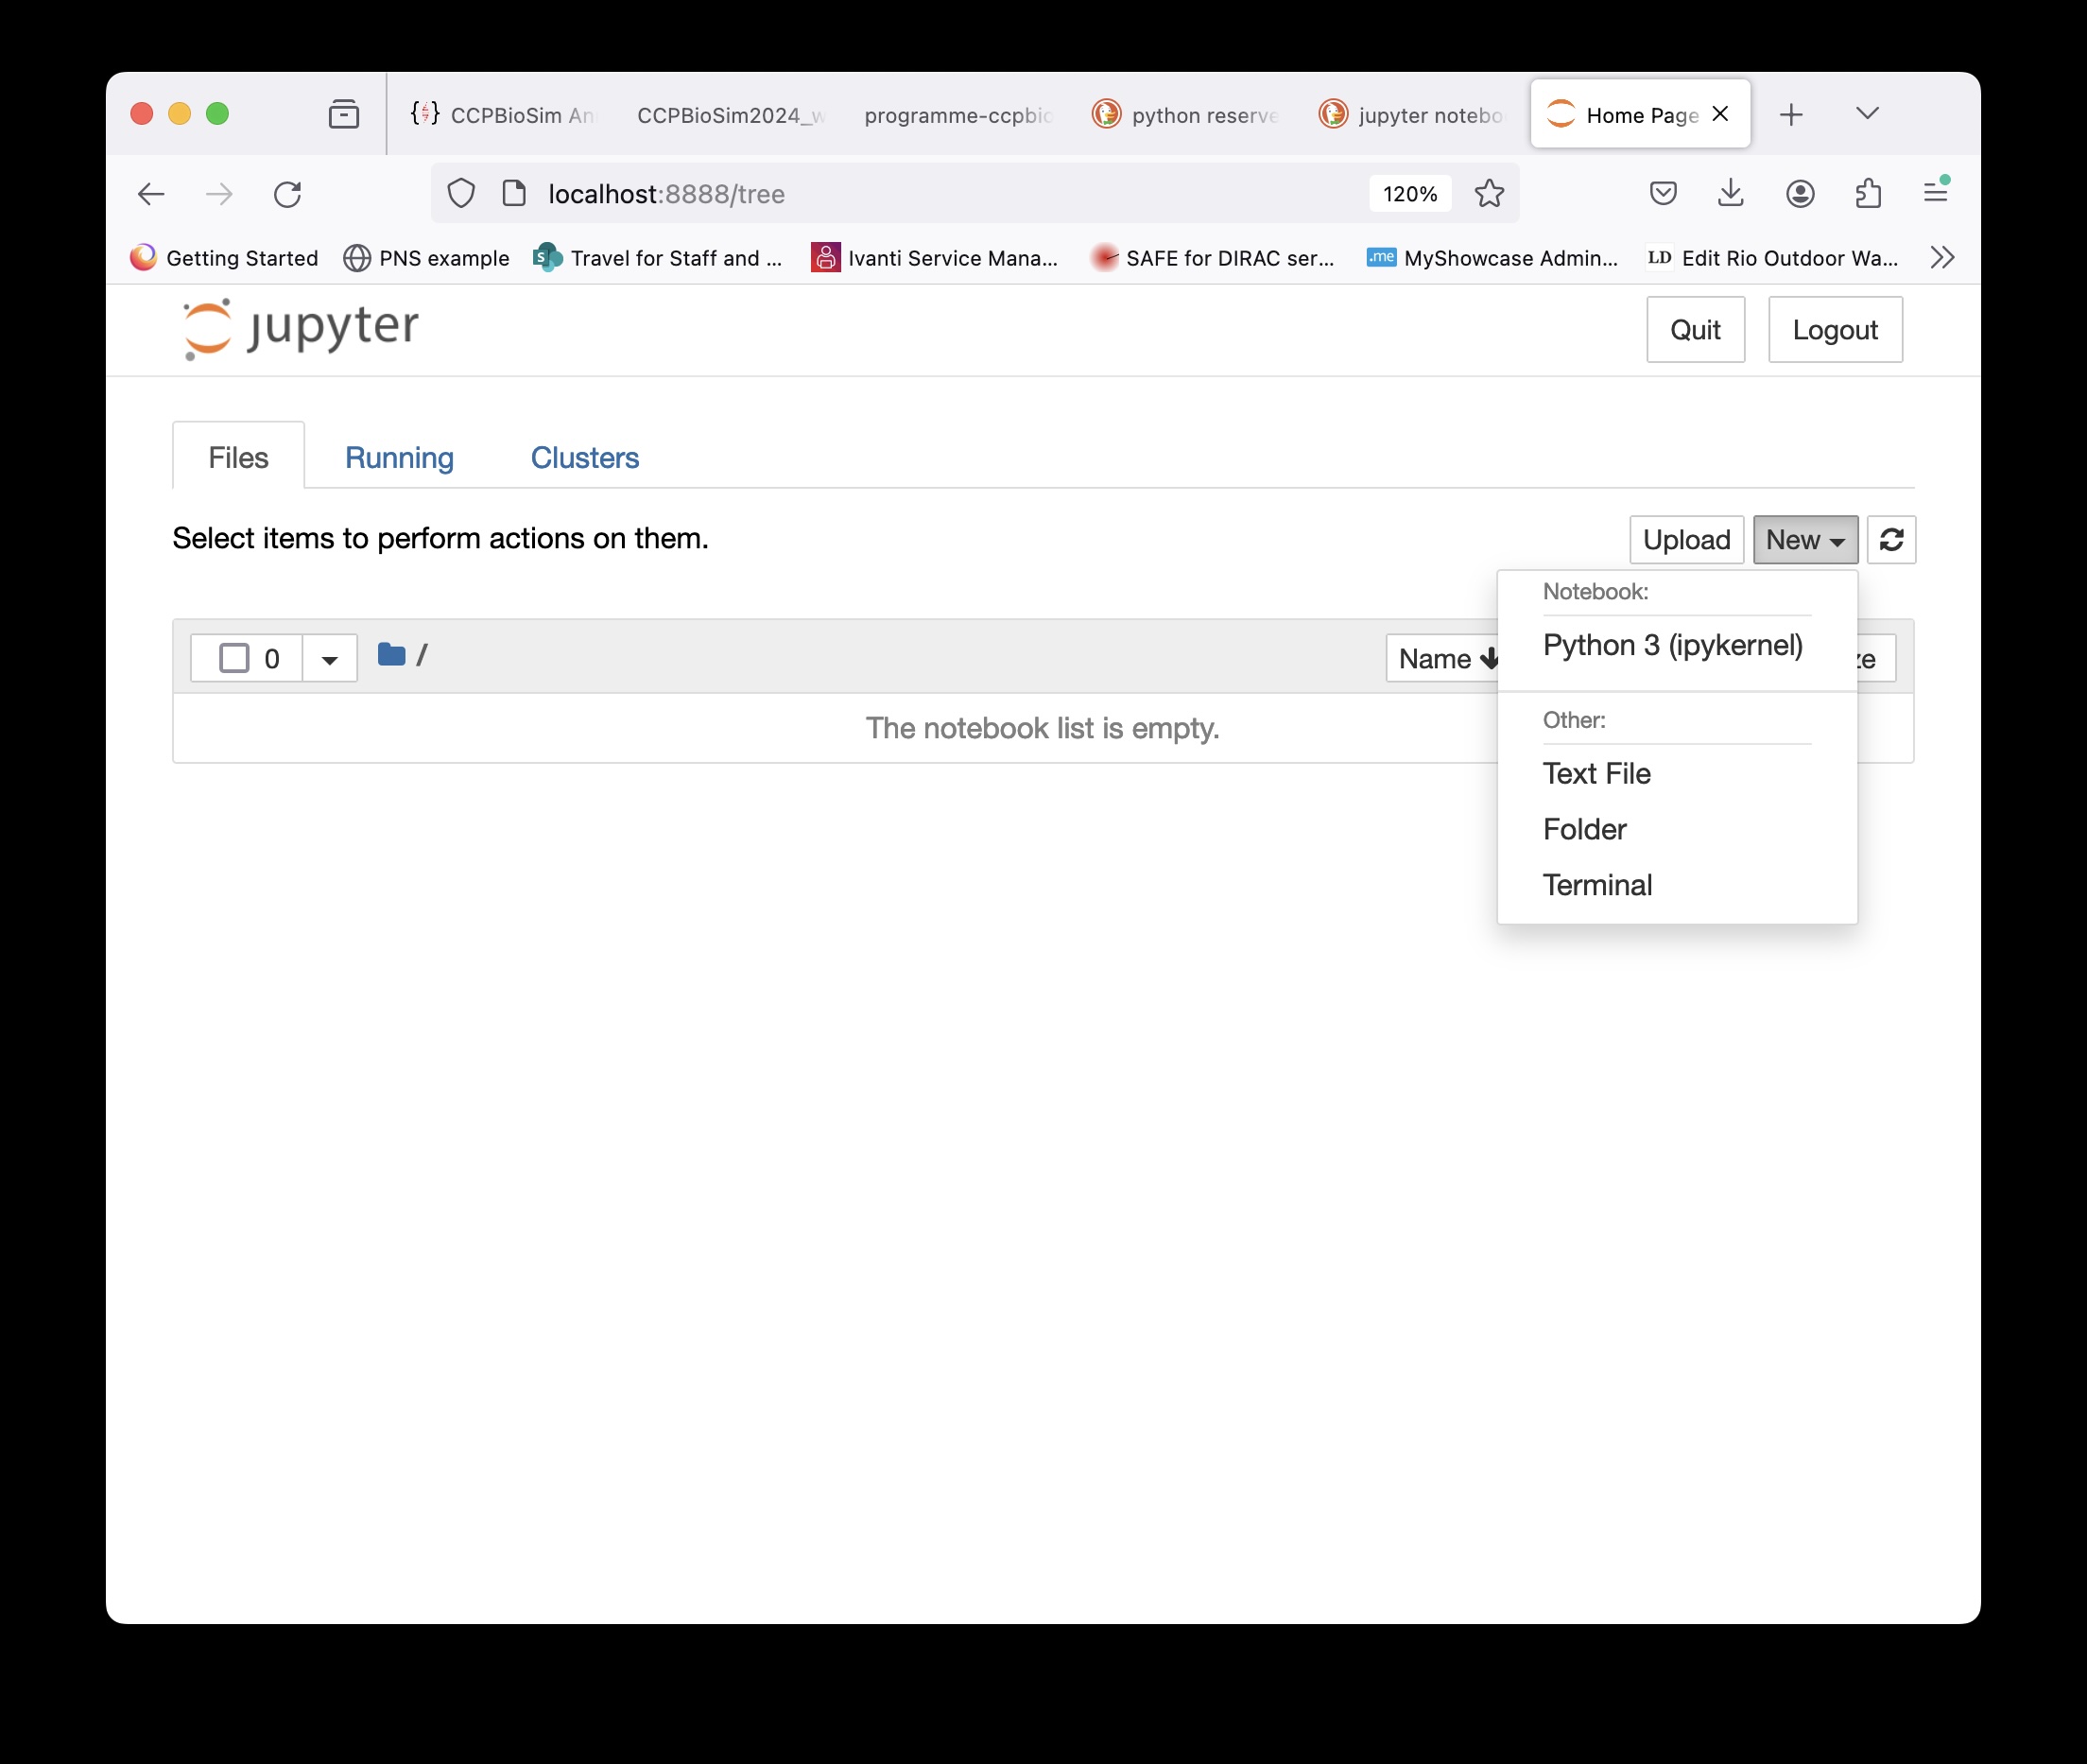
Click the New button on the right near the top, and choose ‘Python3 (ipykernel)’:
After a few seconds, a new tab will open in your browser, looking like this:
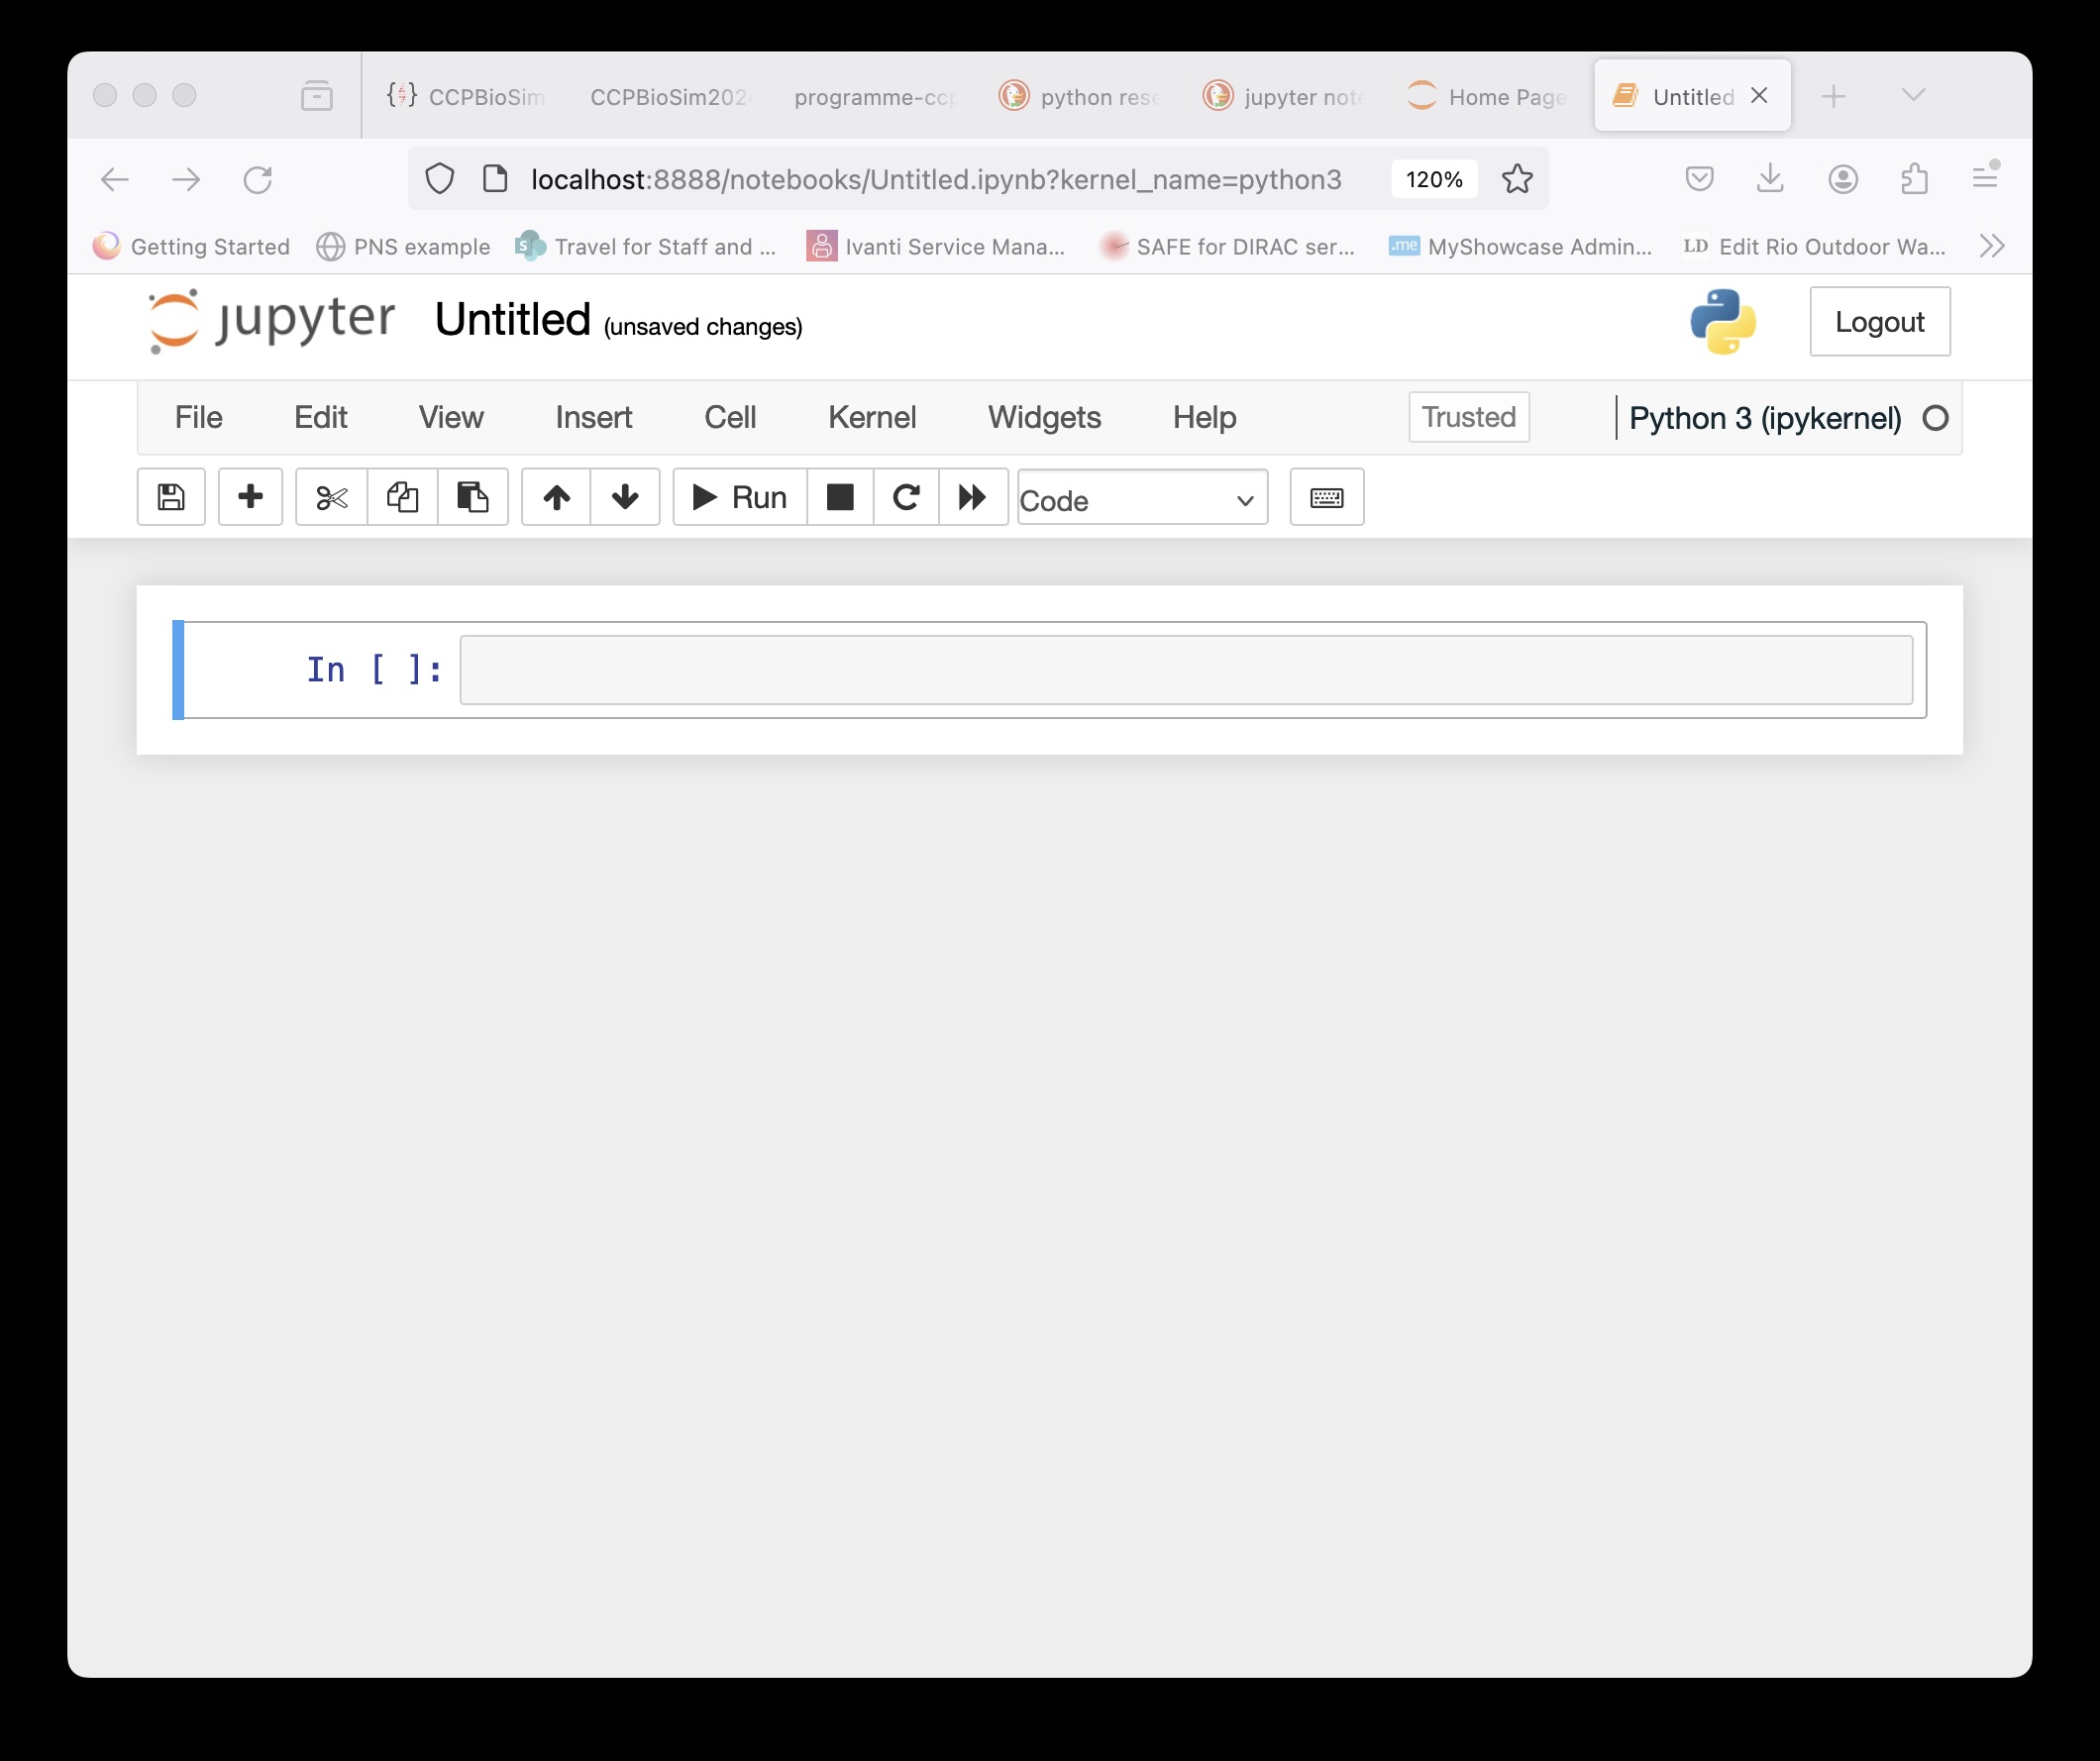
There are lots of menu items, buttons and boxes here, but for now we will ignore nearly all of them.
Task 2#
The box at the bottom with a blue line at its left edge and In [ ]: at the left is a cell.
Click into the grey area in this cell - the blue line will turn green.
Type
print("Hello World!")into the grey box.Click the ►
Runbutton near the top of the window.
Analysis#
Congratulations, you have just learned yet another way to write a Python program that prints “Hello World!” to the screen. Notice also what has happened:
A new, empty cell with a blue line to the left has appeared below the last one.
The original cell now shows
In [1]at the left.
Task 3#
Click back in this first cell. The border to it returns, in green, and you can see your cursor at the end of the text. Now you can edit the text - add a second line that reads print("Python is fun"), then click the ► Run button again.
Analysis#
Cells in notebooks can contain many lines of Python code, and you can edit them and re-run the cell to see what happens very quickly - great for experimenting with and learning Python.
As this module progresses you will use many more features of Python Notebooks - sometimes called Jupyter Notebooks - but for the rest of this section we will be keeping it very simple.
Task 4#
Click back in this first cell. Delete all the code in it, and replace with:
greeting = "Hello World"
then click the ► Run button again. Now, in the new (empty) cell underneath, insert:
print(greeting)
and run that cell.
Analysis#
When you run the first cell, there is no output - but the code in that cell has been run - there is now a variable called greeting that has the value “Hello World”. You discover this when you run the second cell underneath. So you see how each cell in a Python Notebook is not a separate programme, just a separate part of the same programme. This is mainly very useful, but there are a few things you need to be careful about…
Task 5#
In the currently highlighted cell (the one underneath the “Hello World” message) insert the following code and then run the cell:
greeting = "Python is fun"
There will be no output. Now click back in the cell that contains the print(greeting) command, and (without editing anything), re-run it.
Analysis#
The first time you ran this cell, it printed “Hello World”, but this time it printed “Python is fun”, even though the the assignment statement that set the variable greeting to this value is in a cell further down the notebook. This is a feature of Python notebooks you need to be careful about - the order in which Python commands get executed depends on the order the cells containing the code are run in - not the order they appear on the screen. This is why cells that have run have the numbers in square brackets (like [5]) in them - they allow you to keep track of this.
Task 6#
Look back at the last topic - “Strings and things” - and re-run some of the exercises there from inside your Notebook. When you have finished, use the Save Notebook As… option under the File tab at the top of the window to save your notebook (with a name of your own choosing).
Use the Shut Down option under the Files tab to end your Jupyter Notebook session. In the terminal window you used to launch the notebook in the first place, you should see the shut-down process happening, until the command prompt reappears.
Try re-starting the Jupyter Notebook server, and work out how to re-open the file you just saved.
Summary#
Hopefully you have discovered how Python Notebooks enable you to play around with Python very easily and flexibly. In later topics you will explore their potential more fully - Notebooks are not just for practice, there are real-world Python applications (particularly related to interactive data analysis and visualization) that exist purely in Notebook-form.